Sunday 30 December 2012

Hope Your Christmas was a Merry One!

Our family had a wonderful Christmas and hope all of you folk did as well.  We did not have a white Christmas, but that's okay as we had to travel to our daughter's for Christmas dinner.  We have since been bombarded with a good snow-fall.

I thought I would share 2-3 cards with you that I made for Christmas.....CUP cards of course.


The top two cards were designed by Sandie Burchell (designer at CUP) and are
called a "Christmas Picture Pop-Out, 3D Small Square" and come in
the form of a kit.  The instructions are very clear and really make up for
a lovely Christmas Card.  I added red gems for the holly and red gems
for decorations on the tree.  The snowman is an extra I added just to
give it a bit of a whimsical look.


Isn't this just the cutest Santa?  I had fun making this one!
Santa was designed by Mary Jane Harris at CUP.  I added white
sparkly snow on his hat/suit white parts and gold glitter to
his belt buckle.  I then added curly white hair for Santa's
beard.  Lastly, I added 3 gems to the holly on Santa's hat.
You can flip just his face/beard up and it says underneath
"You better watch out
You better not cry
You better not pout
I'm telling you why....
Santa Claus is Coming to Town"

Saturday 10 November 2012

.....Owl-ways Making Cards (lol)

Hello Crafty Folk:

I would like to share some Birthday cards I recently made and I bought them as "backgrounds" on the CUP Site.  The backgrounds are all the same but different colours.  I tried to make each one a little different.  Two of them are mounted on Spellbinder Dies - sentiments were created on my Cricut, Cuttlebug and one is computer generated.  I enlarged the owl from the background and built him up with foam pads.  .....of course I had to add googley eyes - hope you like them. The turquoise owls, I made a white strip with punched edges to mount the 3 little owls on and also added 3 black gems.

All three backgrounds were designed by Anne-marie Vaux - she does some nice/fun designs, so just click on her name and have a look around.  These cards were such fun to make.


Sunday 4 November 2012

Happy November Crafters

My word, I totally missed "October" with posting on my blog.......too busy making Christmas Cards, I guess.  I have two great kits I made for our daughter's birthday and our son-in-law's birthday this month.  They were such fun to make and are both CUP cards.

This first card, is of course, for our son-in-law, who is an
avid golfer.  The type of card is an easel card and decoupaged on
the front.  It folds right down flat so as to put in an envelope as well.
The designer of this fun golf card is "Julene Harris" on the CUP Site.
I have lined the back of the card with the green background and
raised the 3d cut-outs on the front with foam pads.  I chose to
put the verse on the bottom side.


This is also a fun card to make - lots of little bits
and pieces.  Our daughter has a black piano that looks
just like this so, I was so excited when I saw
this kit on the CUP site.  On the left of the piano, was a
candelabra, but I replaced it with a bust of Beethoven.  She has
one of these on her piano and Beethoven is her favourite composer.
This card is called a "Piano Concertina 3D Shelf Card Kit".  The
accordion folds on the sides hold it open so it will stand but,
you can press it flat to mail as well.  This beautiful kit was
designed by "Sandie Burchell" on the CUP site.  I have put
the verse on the back of this card.

Saturday 29 September 2012

......Phew, The End of September Already???

Hello There Crafters:

I have made some "FUN" cards in the last couple weeks (ALL CUP CARDS) and I want to share them with you - hope you like them and "Happy Fall Y'All".

This beautiful gem was designed by Carol Clarke on the CUP Site.  I printed
this sheet out on Crafty Bob's Glossy Photo paper and the colours
are absolutely amazing.  The word Thanksgiving is decoupaged with
foam pads and this card is in the form of an Easel card with a
matching envelope.  The word "Greetings" and the two pumpkins
either side of Greetings are raised as well.

Ah....yes.....It will soon be Halloween and we love
Halloween in Canada.  This card was designed by
Nick Bowley and is a 3d card (raised with foam pads, the
ghost and pumpkin/leaves.  The main graphic is on black
glitter CS and my base is in the orange.  I added some
black pearls in the ghost's eyes and a couple bats flying
near the ghost.......fun card to make!

Autumn is upon us - and this lovely/cute graphic was
designed by Nick Bowley as well.  The colours are
gorgeous in the real (don't you love fall colours?) and I
raised the flower (pearl in center) as well as the two
cute, cheeky vultures.  I cut the word Autumn on my
Cricut.

Oh my word, I had fun with this card.  I used my wall-papering
skills, hung a picture on the wall, put some western trim
at the top, added a bale of straw with a guitar/hat leaning against
it.  This cute little line-dancer was designed by Gordon Fraser and
I must say, the decoupage is fantastic on it - she really stands out
from the wall.  I added some music notes to let you know
she really is dancing.  I backed the whole card on black CS.

I must have 40 Christmas Cards made, thanks to CUP
and this cutie was designed by Sheila Rodgers.  It is called
an envelope card (scalloped edge), the snowman and sentiment
are raised with foam pads and I added some gems for
embellies and to make it glitter a little.

I love these "Teardrop Cards".  This cute snowman
was designed by Karen Adair - the Teardrop portion is
the part that opens (snowman is 3d'd) and it says Merry
Christmas inside.  I added a couple sparkly snowflakes
to have a little glitter and I glittered on the snowman's hat as
well as his bow.  It was a fun card to make.

The above card is my "pride and joy" - first time
ever I have made a "Double Easel Kit".  This fantastic
kit was designed by Robyn Cockburn and comes with
complete instructions.  My son's birthday is next week and
he is into Nascar Racing (likes to watch it) so I'm hoping
he will be pleased with this one.  Visit Robyn on CUP to
see some more of her beautiful designs.

Oh my this card is so stunning in the real......very rich looking.
The craft sheet was designed by Anna Babajanyan and the colours
are just gorgeous.  I printed it twice and raised the white circle
portion as well as the holly leaves.  I then added some red pearls
for the berries.  The base card (scalloped edge) was cut on
my Cricut with the Art Philosophy Cartridge.  Another
Christmas card to add to my stash.

This lovely sheet was designed by Anna Babajanyan as well.
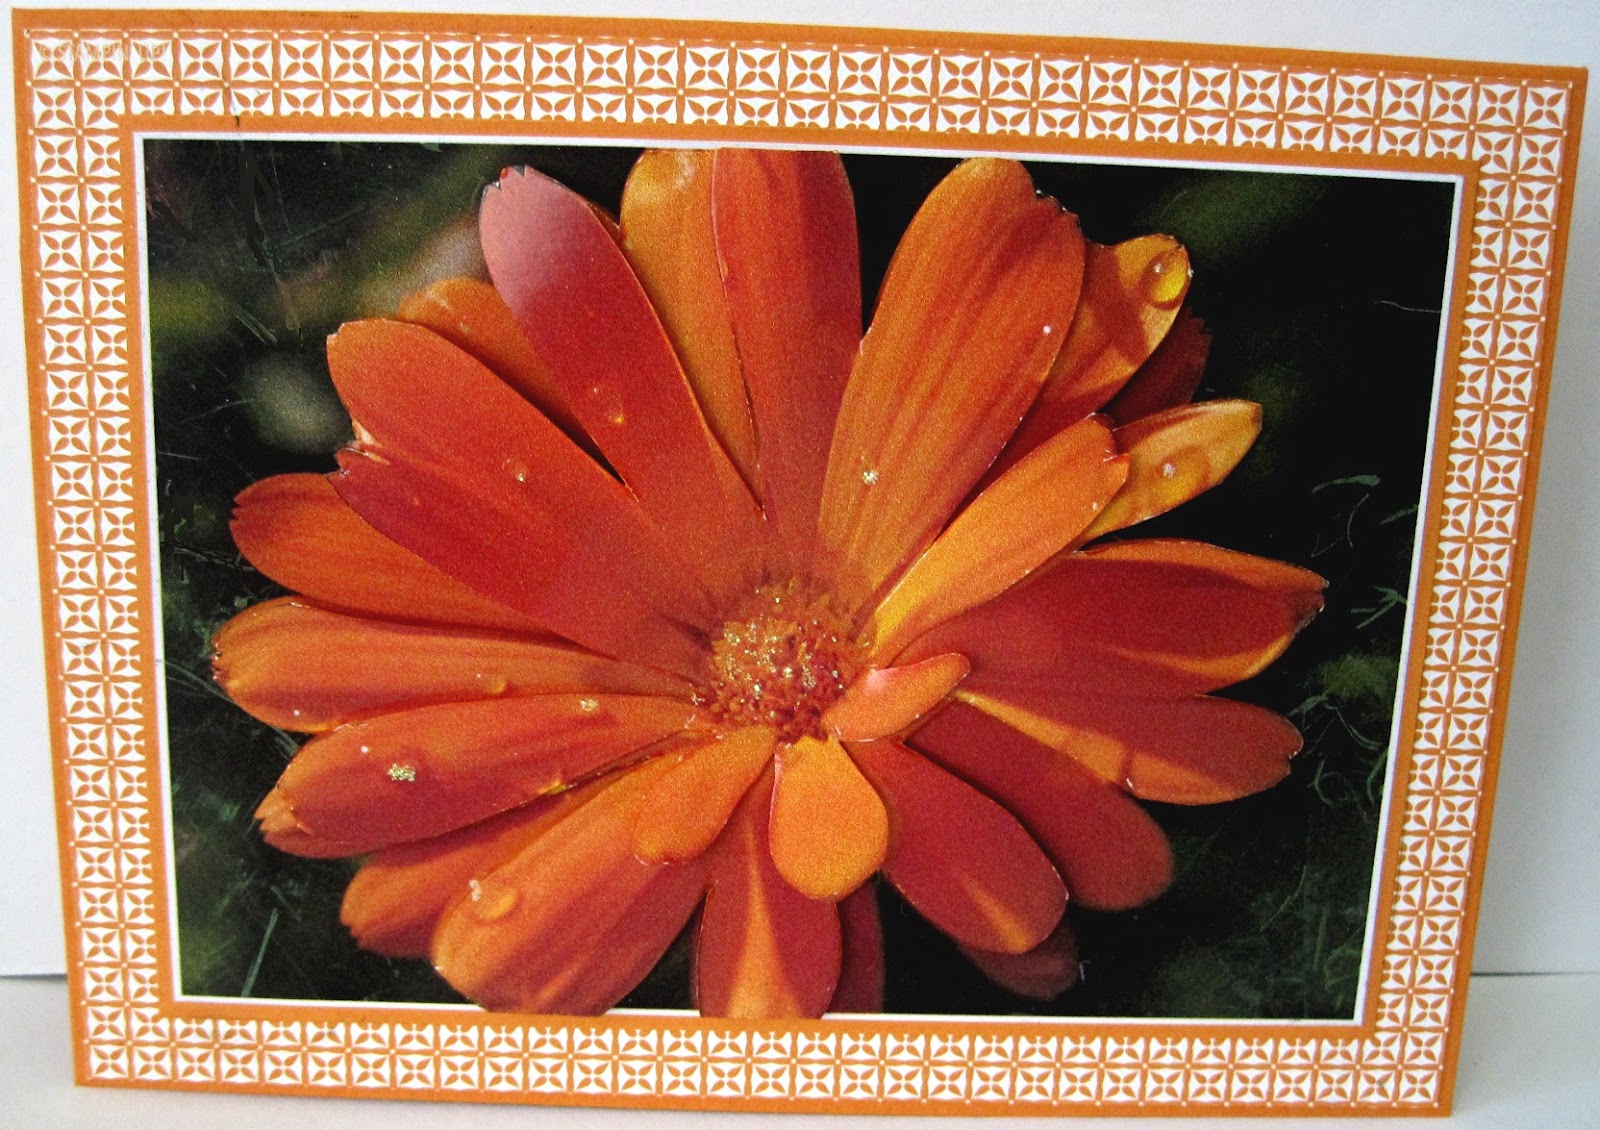
I decoupaged the flower (added a touch of glitter) and lastly a
green bow at the top.  Again, the base card was cut on my Cricut.
A beautiful card to make a person feel better.

Monday 10 September 2012

Happy September Crafters!

It's hard to believe summer is basically over and the kids are now back in school.  I have to say, I am enjoying the cooler weather.

I have six cards that I'd like to share with you and ALL SIX are CUP cards.  I hope you enjoy them and "have a great day"!
This beauty is an actual photo taken by Janyce Cotterill, a designer
on the CUP site.  I printed this graphic out twice and decoupaged it
with foam pads, added a touch of glitter in the center and three yellow
pearls for an embellie.  The sentiment was cut on my Cricut.

I do love turtles and this cutie was designed by Lisa Craig on the
CUP site.  There are many turtles on this craft page when you
purchase it so is well worth it.  I decided to make it into an easel card and I
raised the turtle & little frog as well as the flowers.  I used flowers
for the stopper on the easel card.......added pearls in the center of
each flower and HB (Cricut) as my sentiment.

These little cards are so whimsical and I love making them.
This gem was designed by Eva Cano on the CUP site.  I cut out
all of the decoupage and raised with foam pads and for
embellisments, I added black gems on the ladybug and red
gems on the good luck charm.......such a happy little card!

This sweet card and envelope is a "kit" and was designed by
Carol Clarke over at CUP.  The card is an easel card and
I added glitter here and there as well
as little pink gems.  The "Congratulations" is the stopper for the easel plus
there is an envelope to match.  It is a very cute kit when made up.


What a cute, cheerful card to let somebody know
you are thinking of them.  This card is a type of
pyramid which I raised with foam pads.  Eva Cano, at CUP,  is
the designer of this card.  I added pearls in the
center of the flowers for a bit of bling.

The above card was disigned by Rob Jackson himself,
and the background is a separate sheet from the flowers that
are decoupaged in the oval.  This is very pretty in the
real but is difficult to capture the true colours themselves in
the photo.  I used Sizzix Dies for the ovals to put the
flowers on, added two butterflies (MS) with gems and also
added gems to two of the corners.  The Sentiment was
cut on my Cricut.

Tuesday 21 August 2012

Where Has The Summer Gone?

Well, Crafters, can you believe school starts back in a couple weeks?  I hope you all have been enjoying the summer (it's been a "HOT" one here) and now we have the beautiful Fall to look forward to.

I have a few more cards to share with you - hope you like them - "Happy Crafting"!

The above project was a Cuttlebug Challenge and we had
to take the plastic cover off of a day calendar and personalize the
outside.  I have made this one for myself  and the following
items were used to make it.
- the "M" (my first initial) was cut on the Cuttlebug
- black & white check design paper
- wide red rick-rack
-Prima flowers and button in center
- black cardstock which I ran through my CB with Divine Swirls folder.

This cute little card is a CUP sheet designed by
Sharon Poore.  I decided to print the graphic out
3 times and raised the little girl, box, pups and the
word "Friends" with pop dots.  I added footprints
in the bottom corners and a silhouette of dogs
across the middle - I made this cute graphic into
an easel card.  The puppies noses each have a black
pearl on them.

This lady's name is Camelia  - isn't she beautiful?
I decided to do some wall papering and hang a picture on
the wall so Camelia could pose for me to take her
picture (lol)  I have added Victorian Corners and a few
diamond gems on her dress and one in her hair.  I did print
this lovely lady out twice so I could 3d her with foam pads.
This lovely CUP craft sheet was designed by

Christmas will be here before you know it so why not
get started on your Christmas Cards.  This little gem is a CUP
design made by Nick Bowley.  I backed the main graphic with
green, then white (run through CB with Swiss Dots) and
base is green.  I then cut out all of the 3d pieces and raised
with foam pads.  For embellies, I added red gems on the holly
and the snowman and also added sparkle snow on the trees.

Sunday 5 August 2012

Happy August Crafters


We are well in to summer now and it has been extremely hot here in Ontario.  We finally got some much needed rain.

I've been busy making cards and the ones I will share with you today are ALL CUP Cards.  The designers at CUP are so talented and I love making cards from their sheets. ENJOY!


This is an actual photograph of a marigold ......just look at the
droplets on the petals.  This lovely photo was taken by
Janyce Cotterill at the CUP site.  I printed it out 3X and decoupaged
the flower with foam pads.


Lynne Crosskill at CUP, designed these cute frames.  They would be
good for Scrapbooking as well but I chose to make cards
with them.  I added a daisy (decoupaged) on the red frame and
made a bee on my Cuttlebug for the yellow frame.  I cut the
scalloped white base on my Cricut.


The above card and also the one below were from sheets
at CUP and designed by Eva Cano.  They are both
pyramid style but very different in the shape of the
pyramid.  I added buttons (sewed them on) and black
pearls on the Ladybug as well as a red ribbon.  The yellow
base card was cut on my Cricut.
The Get Well Card below, I added 3 gems in the upper
left corner and framed the card in red and white.  The
white portion of the frame was run through my CB with
the Swiss Dots Folder.


The craft sheet for this Get Well Soon card was designed
by Tom Curtis at CUP.  The red flower is 3d'd with
foam pads and I added the yellow butterfly with pearls down
the body.  I edged the main graphic with the deeper red
and used the green for my base CS.


This little Farm card was made into a two stair-step card and
I was quite pleased how it turned out.  The design sheet was
by none other than Crafty Bob himself.  I first found a
background, added the big green tree then proceeded to cut
out the Farm graphics that I wanted to use.  There is no
decoupage but all of the graphics are raised with foam pads.

Saturday 21 July 2012

Wow, We're Nearing the End of July - Time for More Cards!

Hello Crafters:

Where does the time go - thought you might like to see some more cards.  We can always use new ideas, right?  Here goes.......hope you like them.
I have an anniversary coming up next week & I made this
card for my hubby.  It is a CUP (Crafts-U-Print) sheet and was
designed by Heather Howes on the CUP site.  This cute
little couple is 3d'd - and "old" like us (lol).

These lovely Ballroom Dancers is also a CUP sheet and was
designed by Janet Briggs.  The couple themselves are 3d'd and I
raised them with foam pads.


This Musical card is called a "flip" card and I made this for a
Cuttlebug Challenge.  The card also had to be black and white.
The middle dies were cut on the Cuttlebug and the outside white
part of the die was put throught the Cuttlebug with Swiss Dots folder.

Oh how I love black and white!  This card is a
CUP card and the background was designed by
Ann-marie Vaux.  I added the polka-dot ribbon and
Happy Birthday sentiment was cut out on my Cricut.

.....another CUP card and both the background and the owl
were designed by Liz Harrison.  The owl is 3d'd and Liz has made
the background to match....lovely card for a man.

This card is one of my favourites that I've made lately.  The
scalloped edge, I cut on my Cricut and the poppies are
decoupaged.  The HB & small bud in corner are also raised
with foam pads.  The card is a CUP card and was designed
by Carol James.....lovely card made up.

I had not tried teabag folding for some time so I bought this
CUP sheet of red & green teabags and tried my best to match
up a card that went with them.  The teabags were
designed by Judith Flavel.  I was quite pleased how my
folds turned out - enjoyed doing this for a change.

Friday 29 June 2012

Happy End of June

My word, the summer is flying right on by, before we know it, we will be out Chirstmas shopping (lol).  Well, I do have a good start on Christmas cards so I feel pretty good about that.  I would like to show you a few cards I have made lately......hope you like them and "Happy Crafting".
This lovely white rose is from CUP and it is a 3d sheet.  I backed it up on
the brown and a very thin edge of light beige for the base.  I have added
brown pearls along the ribbon and a touch of glitter on the rose.  This
sheet was designed by Diane Furniss on the CUP Site.

I printed this card out on photo paper, the background is
from CUP and was designed by Sandra Carlse and
the rose is also from CUP and designed by Crafty Bob!
The rose is raised with pop dots, I added a Cricut HB Sentiment
and a bit of bling for embellies.

I made this whimsical turtle into a Get Well type card.
I built his face and feet up, added come decorative corners
with pearls and put some clouds overhead.  I generated the
sentiment on my computer.  This cute turtle is a CUP sheet and
was designed by Janette Padley.

This is one of my favourite cards I made lately and was
purchase from CUP as well.  The frame is one I had filed
under "Hugware" and the beautiful flowers is a CUP sheet
designed by Crafty Bob.  I added pearls and built up
the flowers and outer leaf (right) with pop dots.  It really
is elegant in the real......printed on photo paper.

This was a Cuttlebug Challenge on PCP this week - we had to
use something that flies.  I stamped the bee & ladybug, coloured
them and added a flower & pearl to them  The butterflies were
punched with a MS punch (backed up with black) and I added
a couple pearls to them as well.  I did run the DP through my
Cuttlebug with Swiss Dots EF.  Lastly, I added the yellow/white
polka-dot ribbon.  It was a fun card to make.

Saturday 16 June 2012

Happy Month of June ( a little late aren't I)

Hello Friendly Crafters:

I have 5 or 6 cards I'd like to share with you - two of them are Cuttlebug Challenges and the other four are Crafts-U-Print (CUP) cards.  Hope you enjoy them and Happy Crafting.

This card is a beautiful craft sheet that I purchased from
CUP and it was designed by Ann-marie Vaux.  I used a metallic
white for the base which I ran through my CB, cut out and assembled
the 3d parts, added white stick-on pearls and last but not least,
a sparkle rope bow.  My favourite colour of course....."Blue".

Now, wouldn't this bright and cheerful card make anyone
feel better?.....love it!  This is also a CUP card and was
designed by Eva Cano.  The card is pyramid style (but
fery different) and I like it.  I sewed real buttons on in 3
of the corners with criss-cross red stitches.

This birthday card is a tri-fold and has the flowers
built up with foam pads......also a CUP card and designed by
Anna Babajanyan.  I added yellow pearls to the center
of each flower and green strip and yellow strip of ribbon down
the polka dot strip on the right.

Oh how I looooove this card, so much, that I am
going to keep it.  This is a CUP card that was designed
by Tina Fitch.  She usually just designs cutting files but
very kindly turned this into a PDF format so that us
crafters that don't know how to
use cutting files, can still make the card.  The most difficult part I found,
was cutting the word Birthday out (3 layers)...isn't he a cutie?

This little card, I made for a Cuttlebug Challenge on
PCP - I used the Owl Embossing Folder on
Core-Cardstock and sanded it to bring the owl
to life.  Then I added googley eyes and a
computer generated sentiment.  We were to
make a "male" card.

My Thank you card is also a Cuttlebug Challenge.  We
are to cut most things with CB Dies and use Embossing
folders in our cuttlebug.  Everything was done on
my Cuttlebug except for the leaves.  I had those
left over and thought they would fill in the gaps on
the card.  We were to have flowers and make the
card with the Cuttlebug.